Game builder: Level 1
Below are the lessons for this module. We recommend working through them in order.
Recommended for Year levels: 3-8
Learning areas: Technologies, Mathematics, English, Arts, Media Arts
Capabilities: Creative and critical thinking
To make your game with the programs we'll be using, you’ll need internet access. Keep a document where you can record login details for programs, as well as URL links.
We’ll be using:
Scratch 3.0: a free, easy to use online block coding program
Beepbox: a chiptune music making program
Piskel: an online pixel-art editor
It can be easy to lose work, so make sure you create and save a folder for information, files and game assets.
1. What makes a good game?
So, what is a good game anyway?
Different people have different ideas about what games are good, but game developers and game players probably agree on at least a few elements.
| 1. | Watch Bajo and Hex talk about what they think makes a great game in the video below. |
| 2. | After, discuss with your group what you think makes a good game. Did you have different ideas to Bajo and Hex? |
| 3. | Choose a game to play as a group. After playing, brainstorm what you enjoyed. Focus on the gameplay but feel free to talk about graphics, music, sound effects and any other fun elements. There are some game suggestions below. |
Play student-made games from ACMI's Screen It competition here: acmiscreenit.itch.io/
Or if you prefer, you can play a browser-based game instead we recommend A Short Trip. Play it online, it takes about 5 minutes to complete!
This module includes interviews with ACMI staff who love videogames. We think that to make good videogames, you should discuss with others what you like about the videogames you play.
Watch ACMI staff talking about the videogames they like and consider what it is that keeps you coming back to a game.
2. Exploring game mechanics
What are game mechanics?
Game mechanics are the rules and interactive elements of a game. These rules and elements make up the gameplay.
To create good gameplay, game designers think about how the game mechanics work together, and the gameplay they want players to experience.
Good game developers try not to make a game too repetitive, too easy, or frustratingly difficult. Ideally, the game is easy to pick up, and hard to master.
If you’re starting out, just creating game mechanics that result in actual gameplay is a win. From there you might tweak the mechanics of your videogame or add more elements to improve gameplay.
You can experiment with game mechanics by designing other types of games first – mini-sports, board games and playground games all involve rules and methods of play you can test.
Watch ACMI staff talk about their favourite game mechanics.
| 1. | Within your group talk about a videogame you really enjoy. Record your notes on the worksheet Game builder: breaking down gameplay. |
| 2. | Explain the basic rules of the game. For example, a racing game might require you to drive through certain checkpoints, or impose a time limit. |
| 3. | Describe the game mechanics in terms of movement, what can you do in the game? In a racing game, for instance, you can accelerate, brake, steer. |
| 4. | List the methods required to experience and succeed in the game. In a racing game, you balance speed with steering, and maybe contact other vehicles to get ahead or avoid contact as it will destroy your vehicle. |
| 5. | Describe the appeal of these game mechanics and the gameplay. How challenging is the gameplay? What is fun or different about it? |
| 1. Now create a game from a single sheet of paper. You can pair up or be in a group and use the Game builder: paper game testing worksheet (below) to record your discoveries. |
| 2. You can cut up, fold, tear, scrunch the paper, do whatever you need to do. You can use the surrounding environment as a base, or platform or even a goal for your game. |
| 3. Decide how players interact with the game. What is the aim of the game? What are the rules and other mechanics? |
| 4. Share your game with another group, explaining its goal and the rules. You don’t have to describe methods of gameplay, instead, wait to see if they use tactics you didn’t anticipate. They might try to break the game or discover ‘bugs’. |
| 5. After the gameplay, discuss your findings. Did players uncover unexpected methods of play? Did they try to break the game? Did you have to explain more rules? |
| 6. Ask them what they thought of the mechanics and the gameplay. Could the mechanics be tweaked to make the gameplay more enjoyable, or challenging? Were there any bugs that meant the gameplay couldn’t be achieved? |
| 7. Games need to be tested a lot during development. From your observations of players, produce a new version of your game. Iron out any bugs, and enhance gameplay where necessary. |
3. Forming a game story
Storytelling and characters in videogames
Games are more engaging if they involve a story, or narrative. Games narratives range from sandboxes like Minecraft where the story is all about what you create, through to games that have complex, interactive narratives.
Through story you can add stakes to your player's actions. By stakes we mean consequences for the player. So, does the fate of the planet rest on the result of the Paper, Scissors, Rock game?
By including a narrative, you might also think of interesting story moments or dialogue that could be written into the gameplay. If there’s a non-playing character or opponent in the game, you could give them a backstory and dialogue.
In the Paper, Scissors, Rock game we're creating, we are going to have a beginning, middle and end to our story.
The beginning involves the information the player learns at the start of the game, the middle is the gameplay, and the end is the resulting win or loss.
Hear from ACMI staff below as they talk about their favourite videogame storylines, and think about any game storylines you've really loved/
| Basics | Thinking about Tetris or Pong, Get imaginative. What could be the backstory to these blocks flying around? |
| What happens when a player wins? | |
| What happens when a player loses? | |
| Characters | We love memorable characters like Mario. Think about the kinds of characters who might be involved in your storyline |
| Focusing on either your Tetris or Pong story, create characters for the game. Who are they? Why are they here in your story? What have they got to lose or gain? | |
| Storyline | Now that you know who's involved, flesh out the beginning, middle and end. |
| What information is communicated to the player at the beginning, before the gameplay starts? | |
| What information will the player get during gameplay, eg. when players score or take hits? | |
| What information will the player get at the end, when they win or lose? |
Finished?
Keep going with the Paper, Scissors, Rock example and create a story around the gameplay – what has taken place before the gameplay starts? What happens to the winner or loser? Could you change the game story and the world by changing the objects? For example, a science-fiction version might keep the original rules of the game but involve a Force Field Shield, Lazer Knife, and Ion Cannon.
4. Graphics and artwork
Sprites, backdrops and costumes
A game's look comes from its artwork and visual design. Videogames don't have to have incredible graphics to look great. Think about the simple graphics in Minecraft and Terraria.
The artwork of a videogame builds mood and helps us understand the world we are entering.
For your two-dimensional videogame, you'll be using Scratch, so you’ll need to create backdrops, sprites, and costumes.
A 'sprite' is the two-dimensional design for a character or object in a game. You design sprites for anything that can be interacted with. This includes basic things like platforms or blocks a character might stand on or jump to.
'Costumes' are specific to the Scratch program and belong to your sprites. For example, when your character runs or jumps you'll want a different costume for each different movement.
A 'backdrop' sits behind your sprites. They paint the world of your game and add mood and atmosphere.
Together, backdrops, sprites and costumes make your game unique.
Watch ACMI staff discuss the design and art in their favourite games.
In the next activity we're going to create artwork, backdrops and sprites.
Concept artwork
Before game developers create the look and feel of their games, game artists produce concept artwork.
Colour palettes
Think about the colour scheme of your game. The colours relate to the genre and world of your videogame, and communicate mood and atmosphere.
| Concept artwork | 1. Discuss what you want your game to look like. This might be influenced by your story. For example, is the world of your game fun or serious? Do you want your sprites to look realistic, or cartoonish? |
| 2. Hand draw, or use a digital sketching program, to produce sketches of the backgrounds and characters for your version of Paper, Scissors, Rock. You could also create a mood board for your project. | |
| Colour palettes | Find a videogame similar to yours, and make note of the colour palette. How do the colours help the overall feeling of the game? |
| Try sites such as Colourmind or Coolors to create a colour palette. You can save these palettes for when you create backdrops and sprites, and copy and paste the HTML colour codes into your sprite making software. | |
| Create backdrops and sprites | Make a list of the characters and objects (sprites) as well as any costumes you need. Keep track of your list as you go. Keep it manageable and don't create heaps of costumes for every sprite. |
| You can create your sprites in a variety of ways, using Photoshop, Microsoft Paint, or any program where you can produce images. You can also hand draw your artwork and scan onto a computer. You could even take photos of your own hands to use for the game. |
Tools that can help:
- Colourmind or Coolors to create a colour palette. You can save these palettes for when you create backdrops and sprites, and copy and paste the HTML colour codes into your sprite making software.
- You can create your sprites in a variety of ways, using Photoshop, Microsoft Paint, or any program where you can produce images. You can also hand draw your artwork and scan onto a computer. You could even take photos of your own hands to use for the game.
- We recommend making Pixel art sprites using Piskel, a free, online pixel sprite creator.
You are going to import your artwork into Scratch which supports many file types.
But by the end of the process, your files need to be JPEGS or PNG image files. Check out our tutorial on how to use Piskel below.



Feast your eyes on our paper, rock and scissor sprites!
If you'd like to learn how to animate your Piskels, we recommend this YouTube tutorial. It's time to start creating the sprites for your game. Once you've created your sprites, identify at least one sprite that could do with a costume.
Create a costume
A costume is another state a sprite can be in.
Let's keep it simple so that when a character loses, they flash red like they are taking damage.
In Piskel you can duplicate your sprite, and use the paint fill tool to make the sprite red.
Remember to export this costume as an individual image, and label it something obvious like: character1_costume_lose
Later when you build your game, you can add code so that your sprite changes costume when it loses.
Watch this video about coding costume changes. It also gives you a visual explanation of what costumes are, and how they work.
Once you have created your backdrops, sprites and at least one costume, move onto the next lesson.
5. Logic and coding
Coding is a list of instructions you give to a computer software so it can run a program, a game, or even display a website.
Let’s start with the game you created earlier using a piece of paper. To replicate that as a videogame, you need to use the specific coding instructions known as syntax. Syntax means the rules for how coding is written -- the words and symbols used and how they’re ordered.
Different coding languages have different syntax, but let's begin by focusing on the thinking behind coding.
We want you to think about the Paper, Scissors, Rock game.
Instead of verbally describing the rules, write out a list of instructions for how to play the game.
EXAMPLE: We’ve done something similar for another famous playground game, Hide and Seek.
- Choose player to ‘seek’ - they are the seeker.
- Seeker closes their eyes
- Seeker starts counting down from 60 – they cannot open their eyes or move until the 60 seconds is up
- All other players, the ‘hiders’ search for somewhere to hide
- Hiders assess the quality of hiding spots
- Players choose hiding spots, and hide
- Once Seeker reaches ‘0’ second, they say ‘ready or not, here I come’ loudly
- Seeker starts searching
- They search locations and find the hiders
The last remaining hider wins. Now do the same for Paper, Scissors, Rock in the left-hand table of the Game builder: logic and coding worksheet (below).
The list is not in coding language a computer will recognise but is a little closer to how a computer would understand the game's operations.
Object orientated programming
When you use Scratch you can code to objects. These objects can interact with and react to one another.
This is called object-orientated programming, and it just means you can give instructions to each sprite within the game, as well as backgrounds. This kind of coding, or programming, is great because it means the code the computer reads doesn't have to be in a particular sequence or order and can read instructions coming from all the objects in the game at different times.
EXAMPLE: Here is the list of instructions broken down and split up so they’re applied to the different objects, in this case, players, in the game.
Object = seeker
- Start game
- Close eyes
- Count backward from 60
- When reaches zero say ‘ready or not here I come’
- Can move in all directions and search
- If they find player say, ‘found you!’
Object = player
- Start game
- When seeker closes eyes and starts counting, search for a hiding spot
- Enter hiding spot
- If seeker reaches ‘0’ and no hiding spot has been entered player loses.
- If discovered by seeker, game over
- If all other players are found, the player wins, and stop the game. Working with your partner or team, identify where the instructions for the different objects affect one another and the game.
How could you adjust the mechanics of the game to make the gameplay different? Because we'll be making our own version of an existing real-world game, it is a good idea to think about altering the mechanics of the game to make it unique.
Play: a game can be made very different by changing the mechanics. Try out this version of Pong where instead of controlling the paddles, you control the ball. How is the gameplay different to the original?
Using the right-hand section of the Game builder: logic and coding worksheet you started earlier, create an object-oriented coding list for the version of Paper, Scissors, Rock you're developing. Try to stamp your own personality on the game mechanics and gameplay.
6. Coding using Scratch
- Starting your Scratch project
To build your game in Scratch you’ll need:
- A background for your game
- Sprites for any characters or objects in your game, possibly costumes for some of those sprites
- An idea of the mechanics for your version of Paper, Scissors, Rock (the object orientated coding list from the last lesson will also be helpful)
We’re going to block code using Scratch. Block coding means that instead of typing out all the code and instructions for a computer program, Scratch has the instructions built into blocks that you can click, drag, drop, and combine with other coding blocks to create a game. Many of these blocks require inputs from you.
We highly recommend learning how to use Scratch before developing your game.
Visit the Scratch website and make sure you have an account set up for yourself, or your group, to use.There are lots of different coding blocks to learn about, and we recommend this video playlist which explains a lot of them in sixty seconds. These videos were made for Scratch 2.0, and there is now Scratch 3.0 but a majority of the blocks have remained the same. Have Scratch open as you watch these so you can practise and experiment as you go.
2. Learn about mechanics through Scratch tutorials
Scratch also has a number of tutorials to go with the new 3.0 version which was released January 2019. Check out the list and pick four tutorials to work through, based on the mechanics you have planned for your game.
Keep a list of the ones you have completed and do some reflection with your group members on the new Scratch skills you picked up.
Now you have an understanding of what you can do with Scratch, it’s time to think about applying that understanding by creating a list of coding actions for your game.
EXAMPLE: We’ve done it for our version of Paper, Scissors, Rock, but yours should be different.
- Game starts.
- Computer player and player 1 enter.
- Computer player challenges player 1.
- Player 1 sees three options, paper, scissors and rock.
- Player 1 clicks one option using the mouse.
- Computer player randomly selects paper, scissors or rock.
- Icons for each player’s choice are shown.
- If player 1 wins they say ‘I win’ or if computer wins they say ‘I beat you!’
- If draw both players say ‘it’s a draw’
- Each time someone wins a point is added to their score
- The first player to reach 5 points wins
- Player who wins says ‘I win!’
- The losing player explodes.
From this list, we get an idea of some of the coding required. The mouse will be used as a controller, and we need to code in the dialogue and some random selections for the computer player. We need to do some coding so that the program recognises who actually wins each round, as well as some variables to keep track of the score.
Once one of the players reaches 5, we’ll need the program to recognise this and react with the ‘I win’ line, and make the losing player explode.
Activity: coding actions
Using the worksheet Game builder: Scratch game worksheet (below), write up a list of coding actions for your version of the game. Try to keep the list to around 15 – 20 actions. Any longer and your game might get too big.
Afterwards, go through your list and brainstorm some of the coding you will need to do in Scratch.
From that list, break down your coding into ‘I/we know how to:’ and ‘I/we still need to learn how to:’
Before you make your game, see if can find out as a team how to do the things you haven't learnt yet. Return to the tutorials list of Scratch and see if you can fill the blanks.
You can also
Play our version of Paper, Scissors, Rock below. What features of the game do you like? Are there any you had planned to include in your game? Remember, you can always look 'inside' Scratch projects. If you'd like to see the code for this project you'll find it here. If you notice some problems with the game, make a note of them for the playtesting lesson.
7. Creating chiptune music and sound effects
What is sound design?
Sound design is an important part of any videogame. When we refer to sound design, we're talking about music and sound effects, and how they work together to enhance the gaming experience.
Music and sound effects contribute to the tone and feel of your game, and should aim to reflect elements of the game itself. If your game is all about adventure, the music should reflect that. If your game is retro-looking then maybe some 8 or 16-bit music might suit it? If your game is set during a certain time, you might create music that sounds like it is of that time.
Your sound design should complement something about your game. Perhaps the music can be fast-paced to match the fast-moving gameplay you’ve created, or eerie to match the dark setting of your monster-fighting game. It’s up to you, but consider how it can enhance the player experience.
Creating chiptune music
Of course, not everyone is a musician but you can use programs like Beepbox to create your own music, even if you don't play an instrument yourself.
Using Beepbox you can create chiptune music, also known as 8-bit music. You might recognise this type of music from older videogames, so your game will have a cool retro feel about it. Create some music for your game using Beepbox. Make music for the general gameplay and some music for when your player wins and for when your player loses.
The gameplay piece should be quite long, so it can play throughout the game. You can create loops in Beepbox so don’t worry about having to compose a really long piece of music.
Make your ‘you win’ and ‘you lose’ music quite short.
Before you make your music, think about things like:
Tempo – do you want your music to be fast-paced, plodding, or somewhere in the middle? The tempo (similar to speed) will affect how the player experiences the game.
Key – a key is a series of musical notes that work together. You can experiment with different keys in Beepbox, as you might find a key such as the default key of C sounds nice and upbeat. You might find other keys sound darker, or gloomier, such as G minor. Here’s a great breakdown that associates different musical keys with different emotions, feelings and tones.
Check out our instructional video on how to use Beepbox below:
Now your game is functioning, think about the different pieces of music you need, and where they will be used or activated within your game.
Using our example, we decided we want three pieces of music. One long looped piece for the general gameplay, one for if the player wins, and one if they lose. The last two pieces will be short as they'll be playing at the conclusion of the game. We've mapped out where it will be used (this is helpful as you'll know where you'll need to code the music), and the required length of the music.
Open the worksheet Game Builder: planning music and sound effects (below) and complete for you game.
Sound effects
Scratch has in-built sound effects but we suggest creating your own because it's fun and makes your game feel more original. Check out the footage below from Llama That Wandered a Bit Too Far, winner of the Junior Game category for Screen It 2018. You can also download the game from here, as well as other winning Screen It videogames here.
| Prepare | Go through your game and create a list of all the sound effects you could create. Focus especially on actions within the game. |
| Gather your materials | It's fantastic if you have a microphone and a computer program to record into. If not, you can use voice record applications on a smartphone or tablet. Scratch also has an option to record directly into the program via your computer. |
| Record | Record your sound effects in a controlled environment. This is a quiet space free of noise you can't control. Make sure you review and edit or trim your sound clips, so there's no unnecessary space or noise at the beginning or end of your audio clip. |
| Check your worksheets and see if you have all the music and sound effects for your game. | |
| Import | Import all your music and sound effects files into your Scratch build, then code them all in to play at the appropriate points of your game. |
8. Playtesting and improving
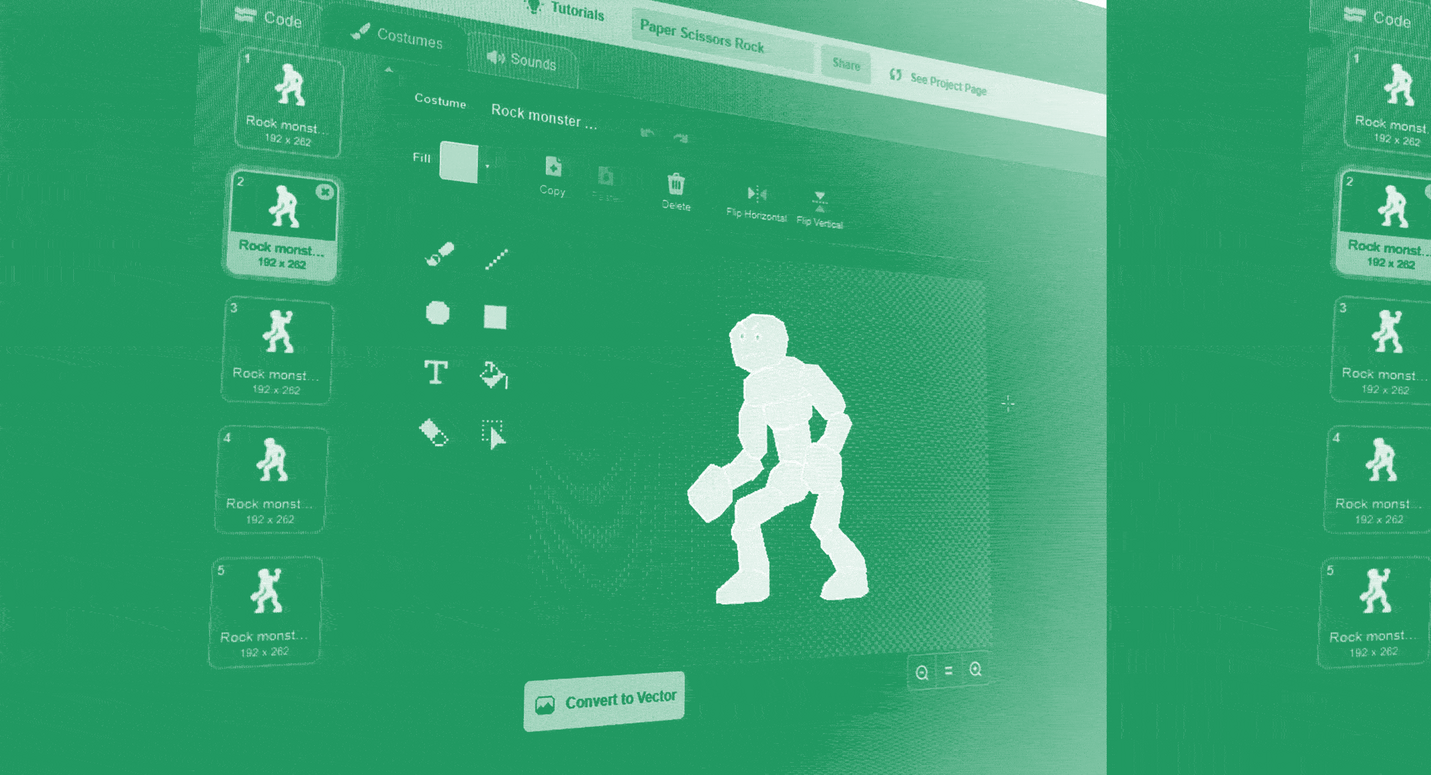
Remember in lesson two when you made a game out of paper and tested it out? The point of that exercise was to identify any bugs with the game and any issues with the mechanics or gameplay.
Now that you've coded a game, and included all your artwork and audio elements, the chances are it will have some bugs. They might be large bugs that prevent the game from working at all, or they might be minor bugs like a costume or sound effect not working as they should. Either way, you need to identify them and work to solve them.To do this you'll need to do some playtesting.
Get some practice by playtesting our version below. Have one or more member of your group play the game whilst others observe and take notes on issues and glitches.
Don't forget, you can see inside the project and even copy it and edit the coding yourself. After identifying bugs, have a go at fixing some of the issues yourself. Access the project here.
Now you've had some practice, it's time to work on your game. First, you should play the game yourself to identify any problems with the game.
Keep a list of bugs or problems you identify, and as a team see if you can fix them. If you can't solve within your team you might have to get some advice from other groups.
After you've fixed the bugs you identified, playtest with others. Choose people who haven't been involved in the creation of the game. Let them play and merely observe. Don't interrupt and tell them how to play, or ask or answer questions. Just observe and make note of any bugs you notice, or moments where the player seemed confused, unsure of what to do, or got stuck.
Afterward, go through your notes with the player and ask them questions about their experience. Take your list and make some final tweaks to the gameplay.
Congratulations!
Once you're done, time to celebrate! Share your finished product with other groups, and play each other's games.
Ready for your next challenge?
Head back to Game Builder or move on to Game Builder: Level 2.